Results Summary
There are three resulting percentages for R&R that quantify how much error is occurring in the measurement: the error due to the device, the error due the operator, and the combination on these errors. It is therefore critical that the equipment both have an accurate measurement and that the equipment perform that measurement consistently when switching operators. The Datalyzer Gage Management Software was used to take the data and convert it into these results.
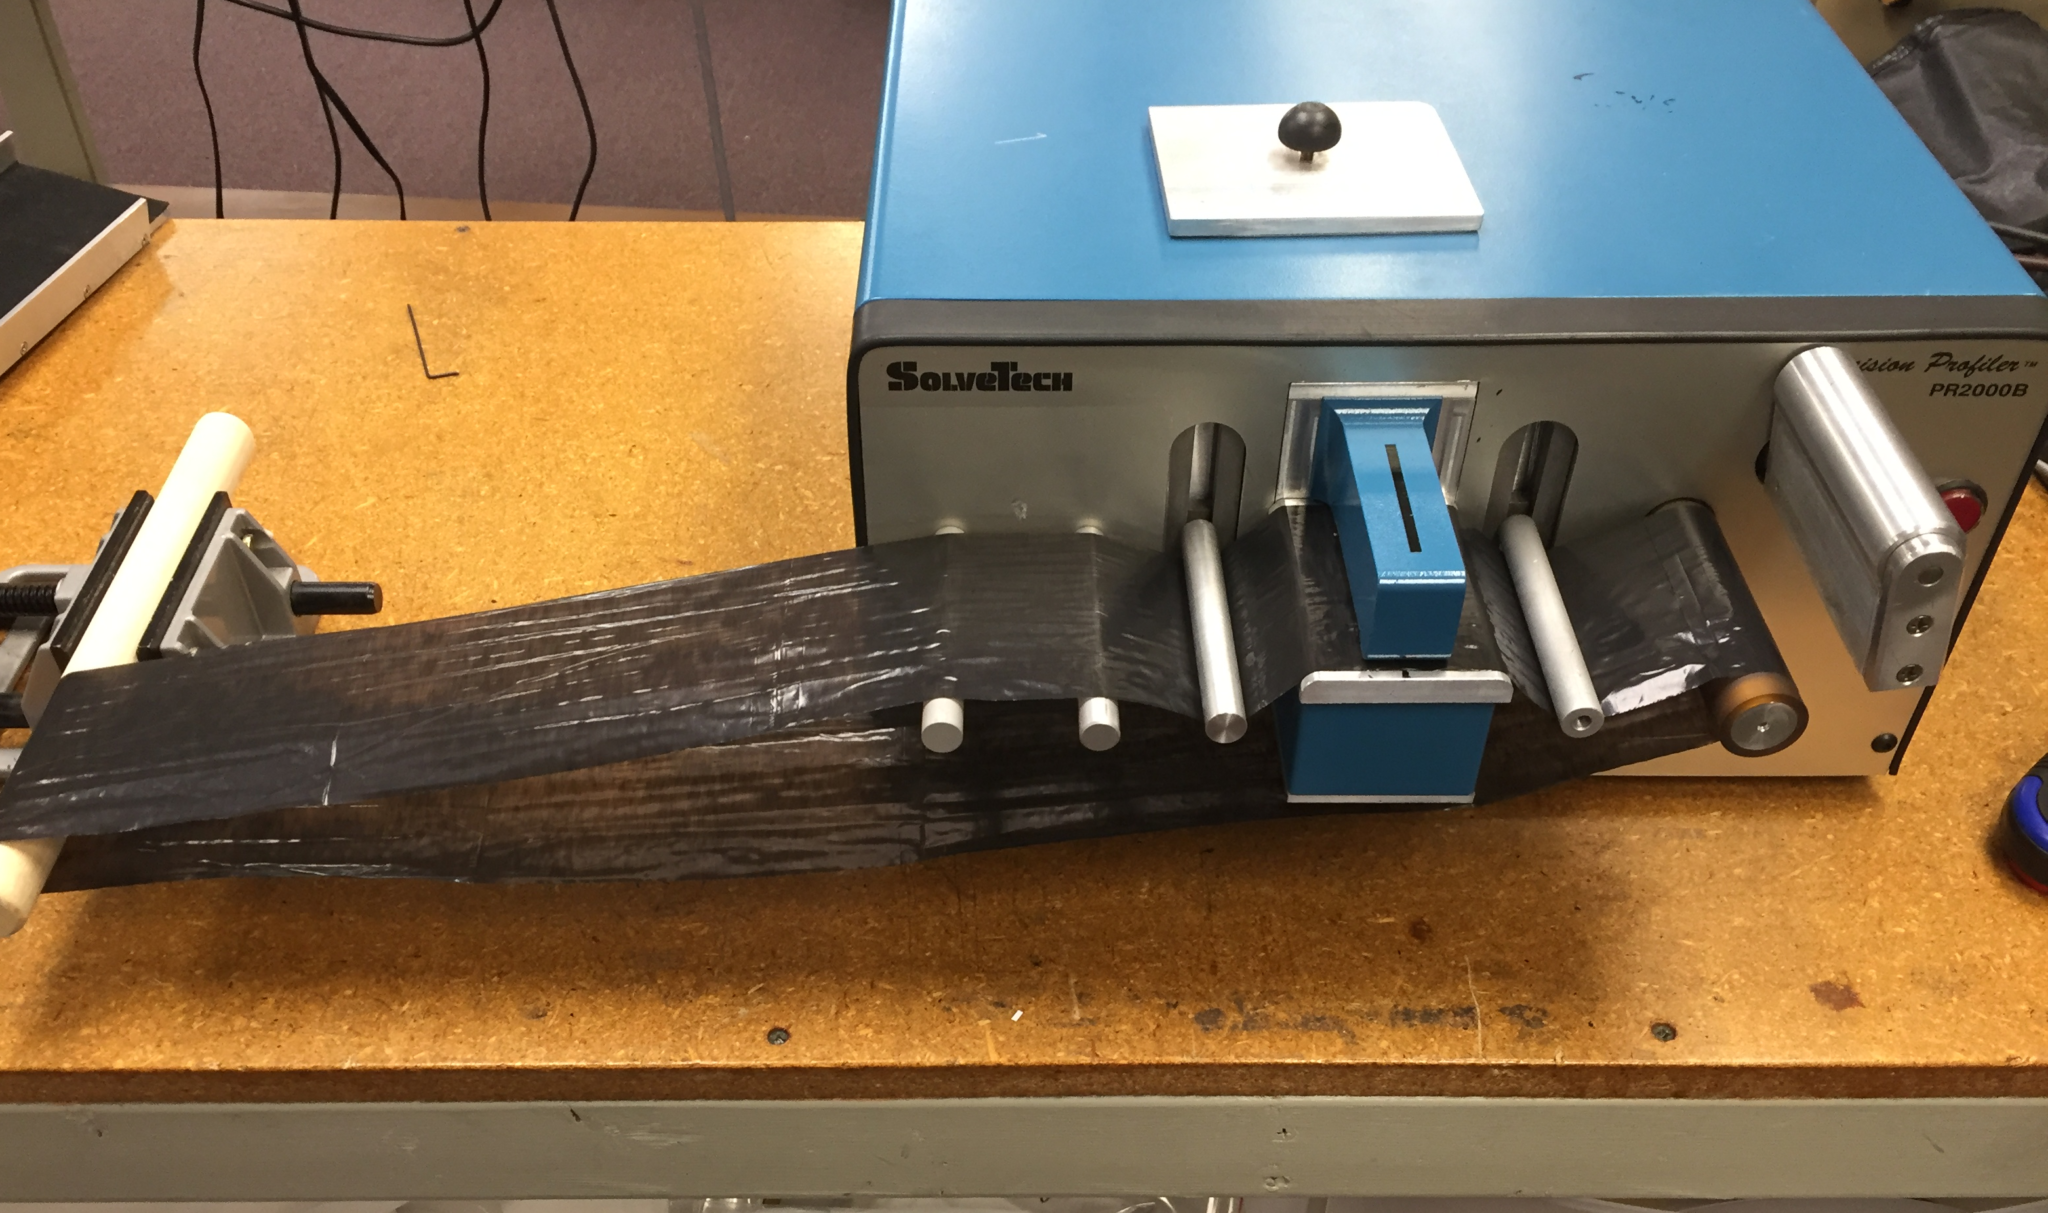
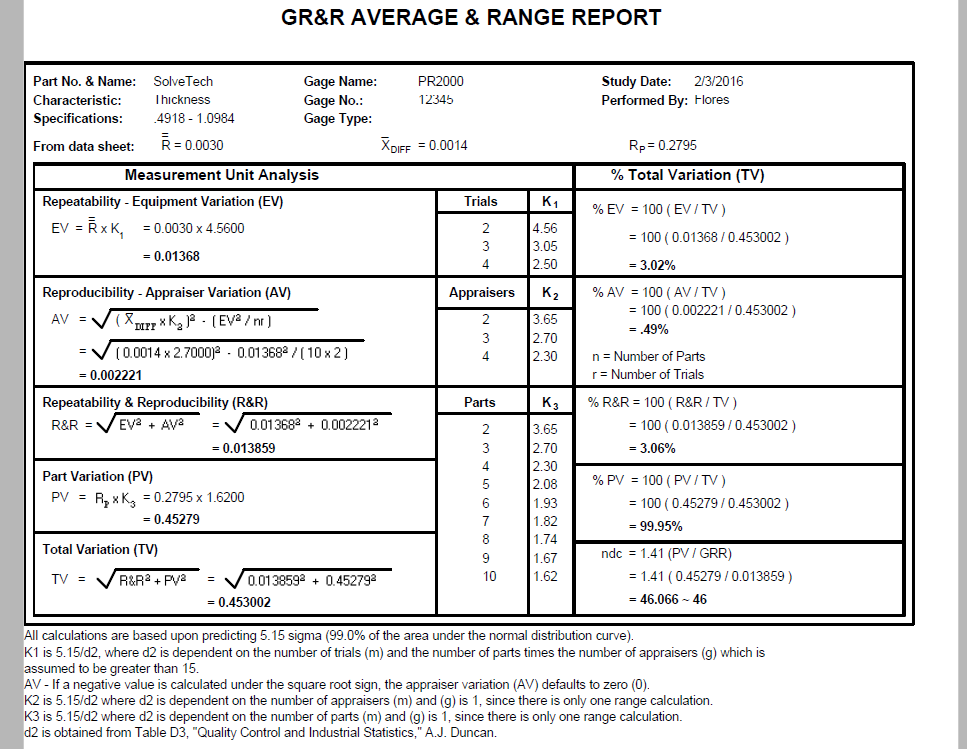
For the PR2000, SolveTech combined their market leading performance of their non-contact capacitance sensor with an easy to use interface that automatically flattens the film consistently with little operator intervention. As a result, the overall R&R was only 3.06%.
Reproducibility is the variation between the users, and here it was found that for the PR2000, the operator only contributed ~0.5% to the overall variability. For the operator Ping, this was her first time using the instrument, so this really shows how the instrument is designed to greatly reduce the impact of the operator.
Repeatability is a measure of the equipment variation and was found to be 3.02%. When using a calibration frame, the PR2000 is typically repeatable to +/-0.001 mils/ 25 nanometers, but when dealing with plastic film, it can be difficult to measure in the same exact location and hold the film perfectly flat when not in a frame. These two factors contributed to the variability being about 3% for the PR2000.
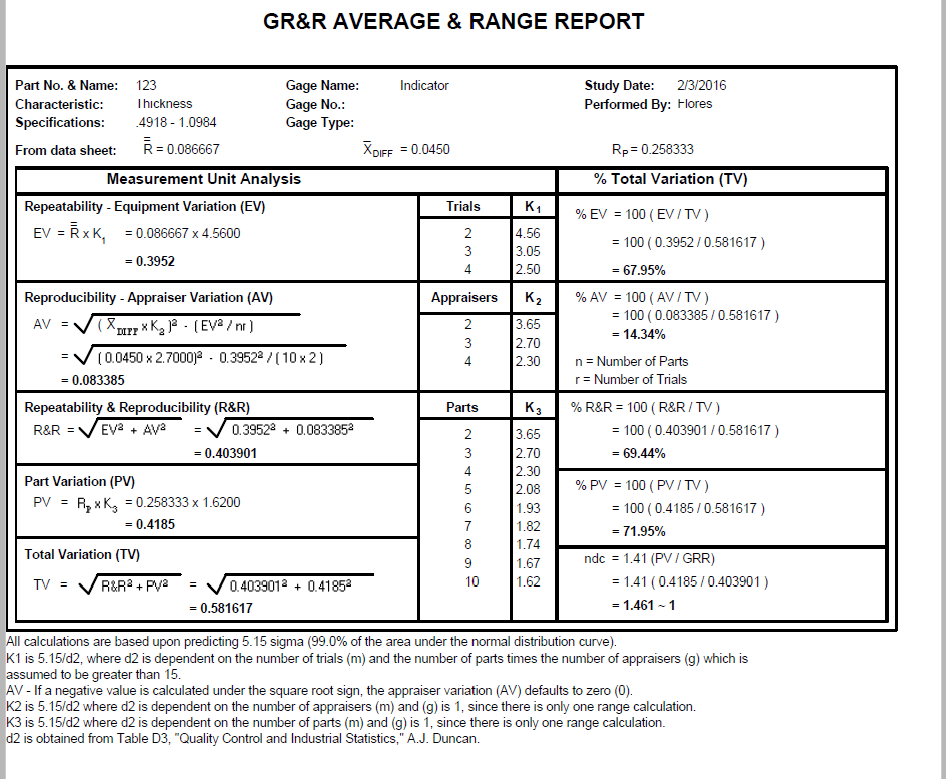
For the micrometer, the overall R&R was 69.44%. Since this was a handheld device, the operator was more of a factor causing a reproducibility of 14.34%. For the micrometer, the repeatability was 67.95% due to the accuracy of the device (~0.05 mils) relative to the overall variation of the film.
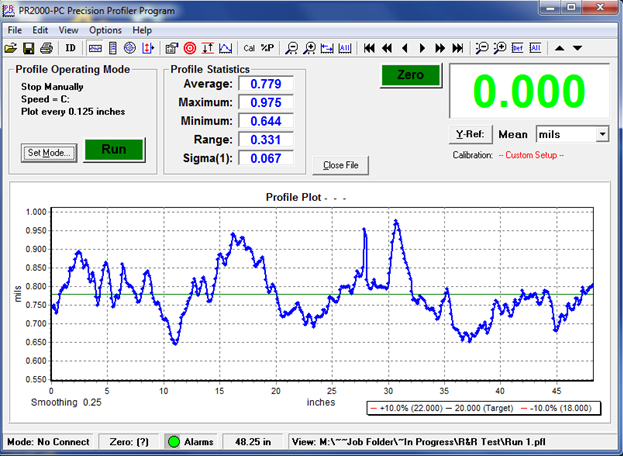
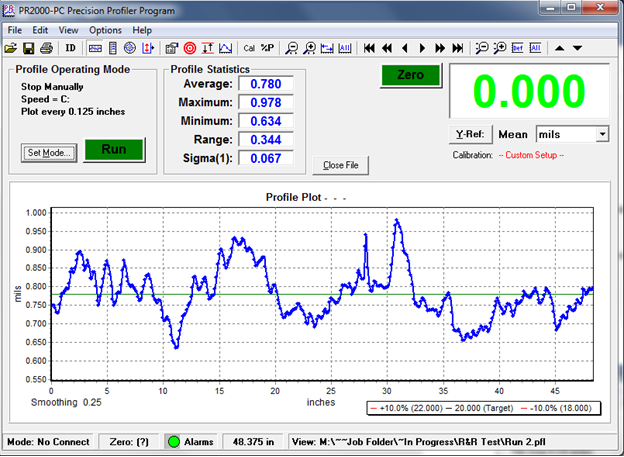
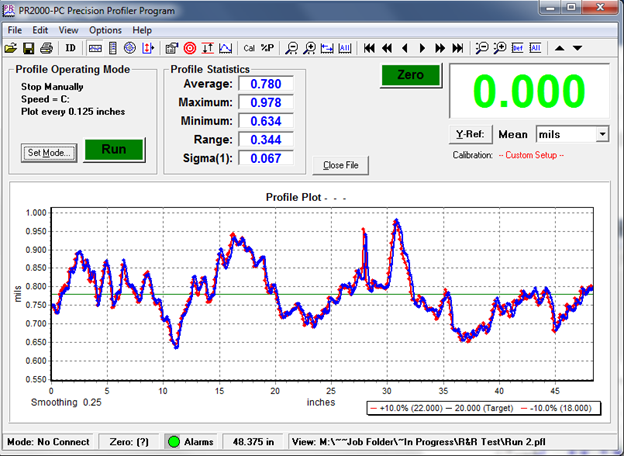
Note: To determine overall variability, the PR2000 Profiler was used in profiler mode. The graphs are presented below. They were run twice to verify R&R of the runs. The graphs are overlaid and compared to determine this, and it is shown below.
Conclusion: PR2000 R&R: 3%, Micrometer R&R: 69%
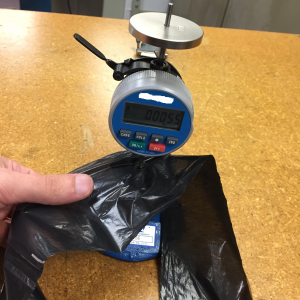
When dealing with a film as thin as 0.8 mils, a micrometer is clearly pushed past its limit. The micrometer has a weight, and it tries to consistently drop the probe on the film. However, this is difficult to do, and many times, the different operators may do this slightly differently. It also typically does not have an accuracy that is an acceptable percentage of the overall material thickness.
Industry experts consider an R&R of 10% or lower acceptable. If the R&R is above 30%, the device is not considered acceptable. Learn more about R&R here.
The PR2000 had more than acceptable R&R results at 3.06%, while the micrometer had an unacceptably high level of error. With an R&R of 69.44%, the micrometer fails to be an effective device for the application.
The PR2000 however is able to perform quite well as it is an advanced gauging system specifically designed for measuring thin films. This results of this study show why many companies chose to invest in SolveTech technology for measuring the quality of their films. The PR2000 has 50x higher accuracy (0.001 mil vs 0.050 mil) than the micrometer, and it is really needed in thin film applications.
Note: A micrometer can still be used as a rough general indicator of film thickness, however this study was to determine its usefulness in studying material variability.
Raw Data
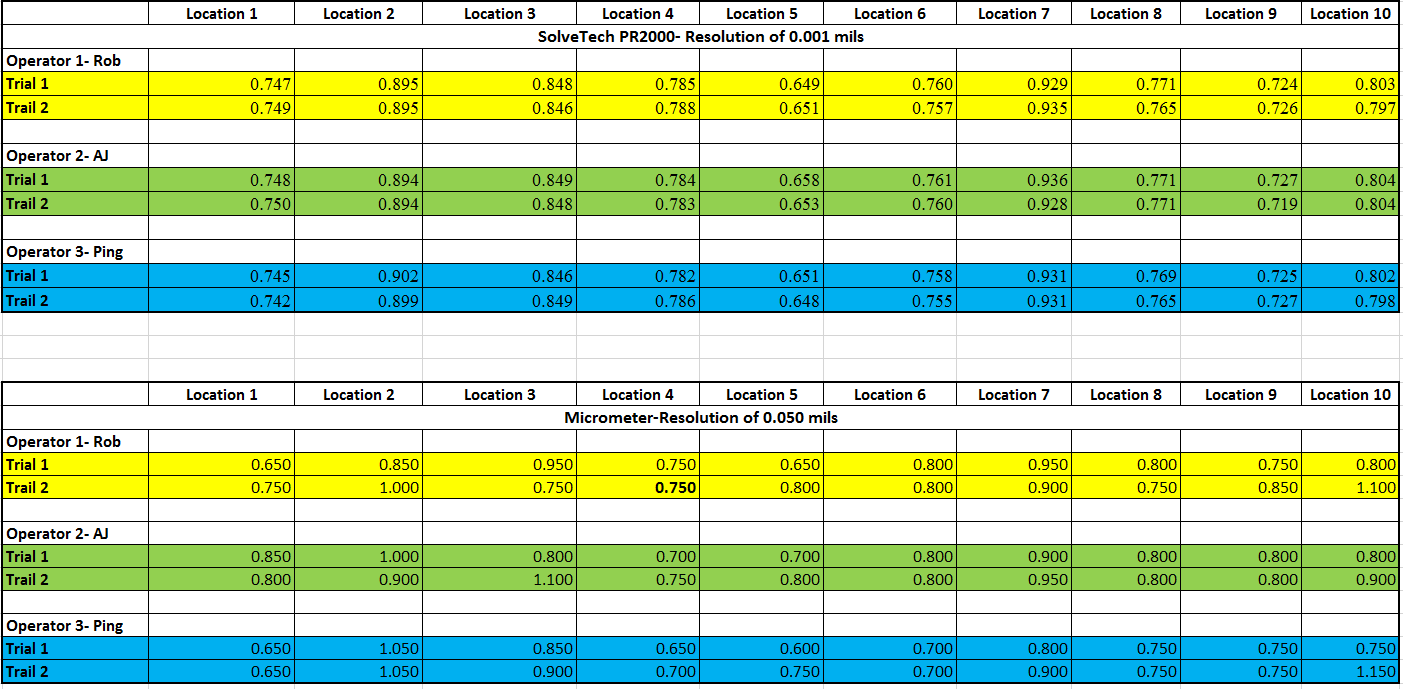
Below is the data collected for the experiment.
Plastic Film Density: 0.9555 g/cm^3
Measurements For R&R Analysis

PR2000 Profile Results- To Determine Material Thickness Range for R&R Analysis

PR2000 Profile- Run 1

PR2000 Profile- Run 2

PR2000 Profile- Run 1 and 2 Overlaid

Reports
Below is the data collected for the experiment.
The PR2000

The Micrometer

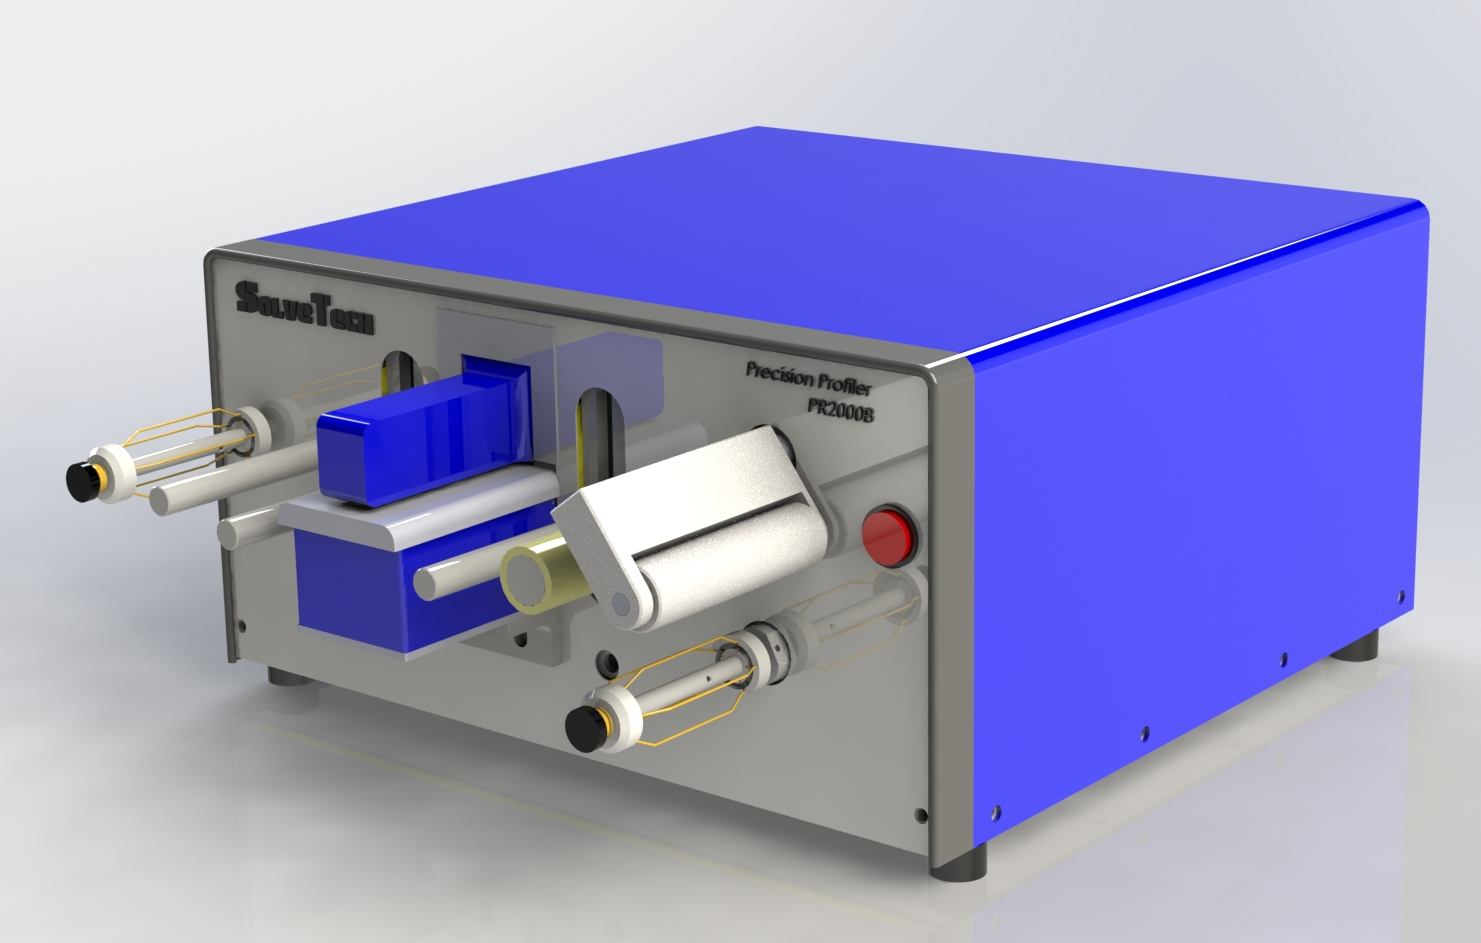 Thin plastic films are inherently difficult to measure due to their possibility to deform when pressed and due to the thinness of the material relative to accuracy of physical measuring techniques. They are often less than 1 mil or 25 microns thick. Many producers try to use a micrometer since it is a simple and inexpensive solution. However, with thin plastic films, there can be some real challenges on repeatability and reproducibility with a physical measuring technique.